How to install Java Development Kit (JDK) on Windows check below
Follow Steps one by one we will guide you properly and in a better way on How to install Java Development Kit.
1. Visit the Java website and download the JDK(Java Development Kit)
Navigate to http://www.oracle.com/technetwork/java/javase/downloads/index.html. You can download a simple Java Software Development Kit (JDK) installer for Windows, macOS, or Linux directly from Oracle.
[su_note color=”#deb5a2″]Also Read | How to Install Ubuntu in Windows[/su_note]
2. Click the “Download” button beneath “JDK.”
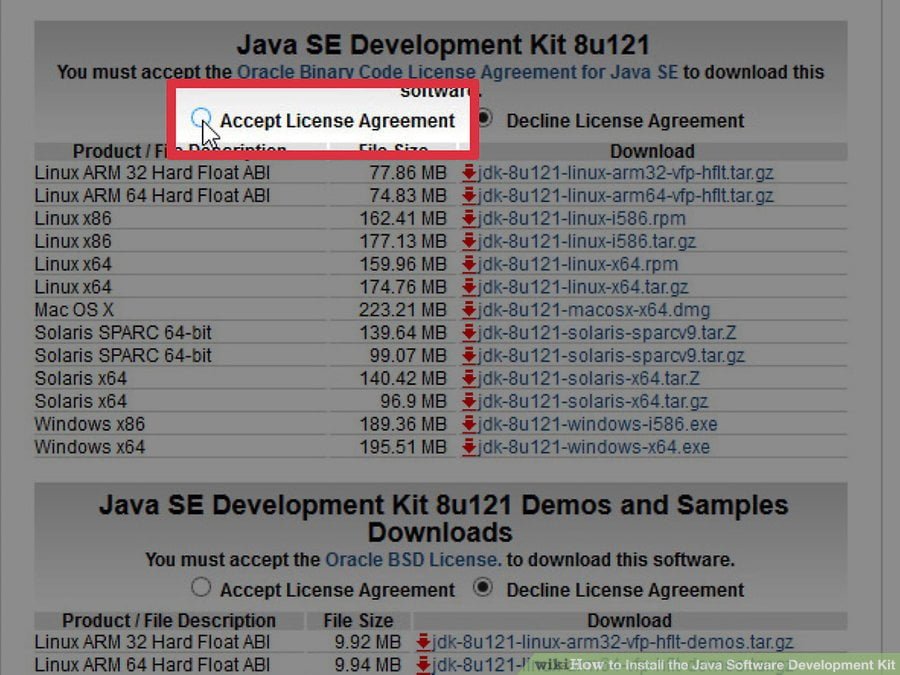
This will open a new page containing several download options.“Scroll to the latest version of Java SE Development Kit”. You should always use the latest stable version of the toolkit. There may be more than one version listed, so look closely at the release number. After that follow following steps
Click “Accept License Agreement.” Before you can click the download link, you must accept the license agreement. The option is just beneath the JDK version number.
3. Click the download link next to your operating system.
Once you click the link, follow the prompts to select a save location on your computer and start the download.
4.Click the download link next to your operating system.
Once you click the link, follow the prompts to select a save location on your computer and start the download
[su_note color=”#deb5a2″]Also Read | How to Install Eclipse Ide in Windows[/su_note]
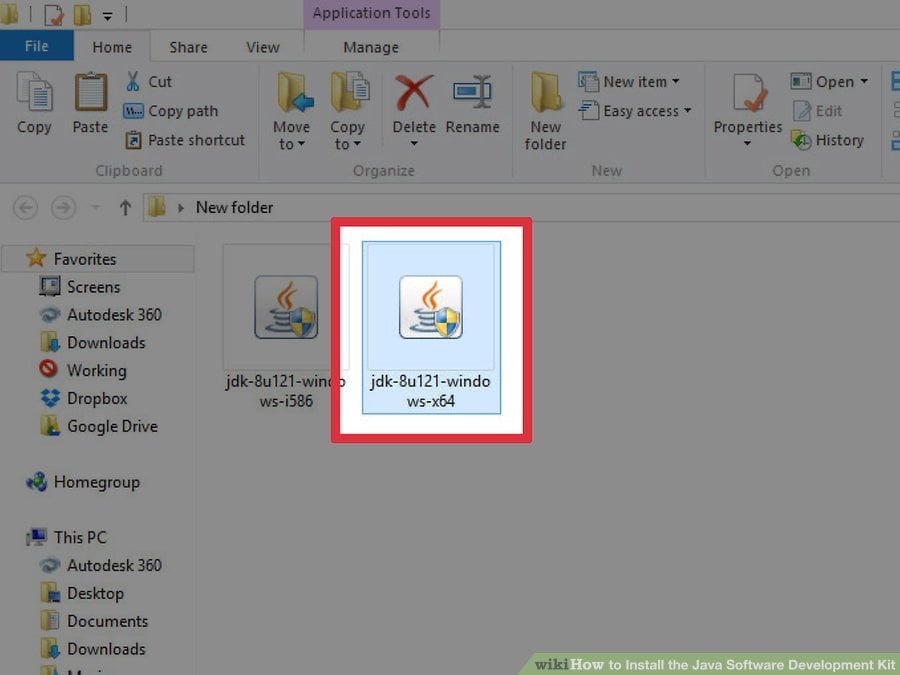
Double-click the JDK installer file. Once you’ve downloaded the Java Software Development Kit installer, navigate to the download location you chose earlier to launch the installer.
After installing that successful you will close at last and give PATH to run your Java Programs.
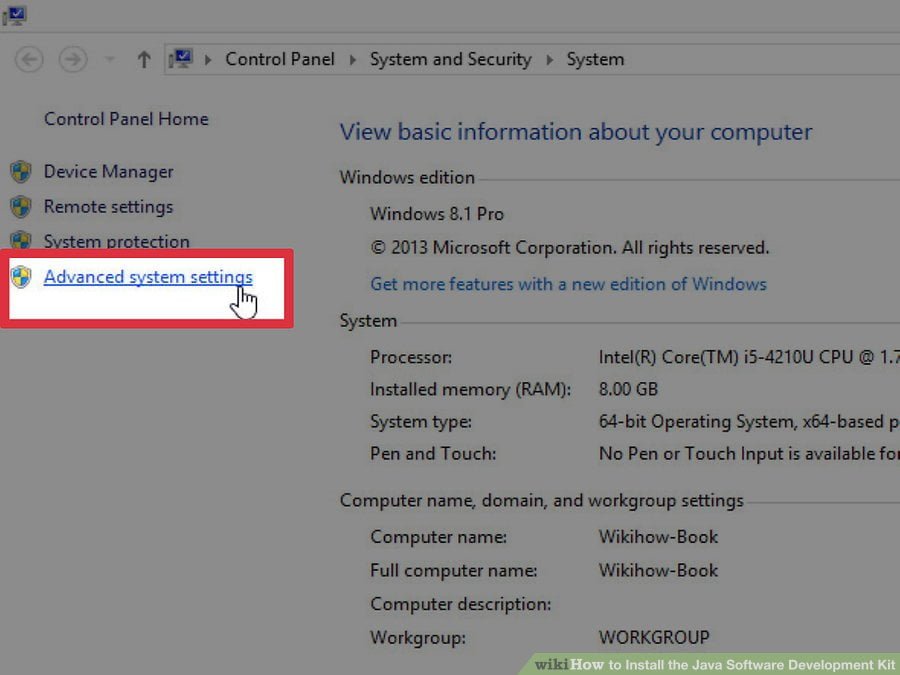
5. Now Go to your System Property.
For open system property right click on My Computer or This Pc
After that go to system advance settings
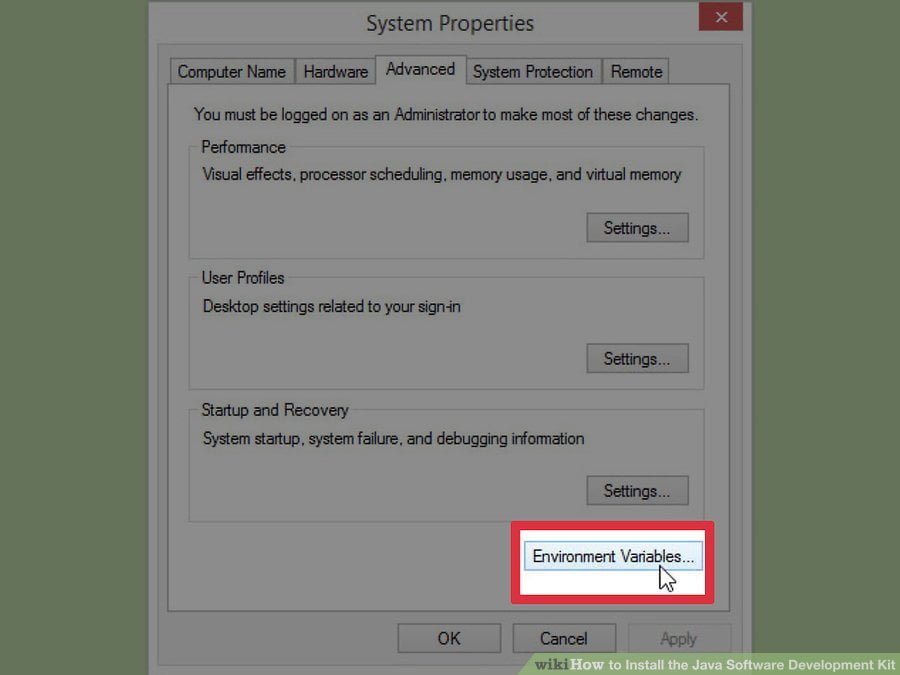
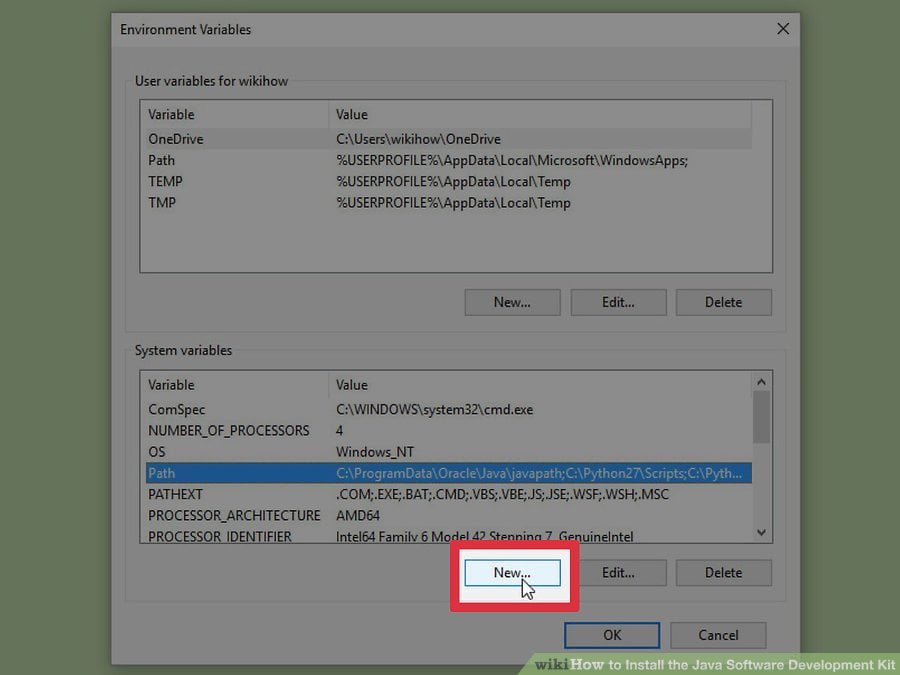
6. After that go to Environment Variables
7. Double-click the “Path” variable under “System Variables.”
Now you’ll add a new variable by following these instructions exactly, as there is no “undo” option.
Click “New” if you’re using Windows 10.
This step only applies to Windows 10:Type c:\Program Files\Java\jdk1.8.0_xx\bin (but replace the “8.0_xx” part with the version number you installed).
Click the “Move Up” button until the path you typed appears as the top of the list.
Click “OK.”
[su_note color=”#deb5a2″]Also Read | How to Install PHP XAMPP in Windows[/su_note]
8. Now open CMD(Command Prompt) by press Win+R and enter cmd in it.
Now type Javac hit enter and you will see some files come on your screen.
Feel free to like , comment and share your opinion with us . Share it with your friends, Family and relatives . Visit us again. If you face any type of problem comment here and we will solve it as soon as possible.




I have checked your page and i’ve found some duplicate content,
that’s why you don’t rank high in google’s search results, but
there is a tool that can help you to create 100%
unique articles, search for: Boorfe’s tips unlimited content
Hey Melvina, thanks for advice , we will check out , keep visiting 🙂
Interesting article buddy, keep updating your website
Thanks for your valuable feedback. We will soon post more articles.
Quality blog brings quality monitoring and changes mind of intelects.A small donation you may be interested. http://corneey.com/wm6Zo9