

Introduction
Forms are the backbone of user interaction on the web. Whether it’s a simple search bar, a login page, or a massive multi-step checkout form, capturing and processing user input accurately is vital.
In traditional HTML, form elements like <input>, <textarea>, and <select>
Uncontrolled vs. Controlled Components in React
Before writing any code, it helps to understand the two ways React approaches forms:
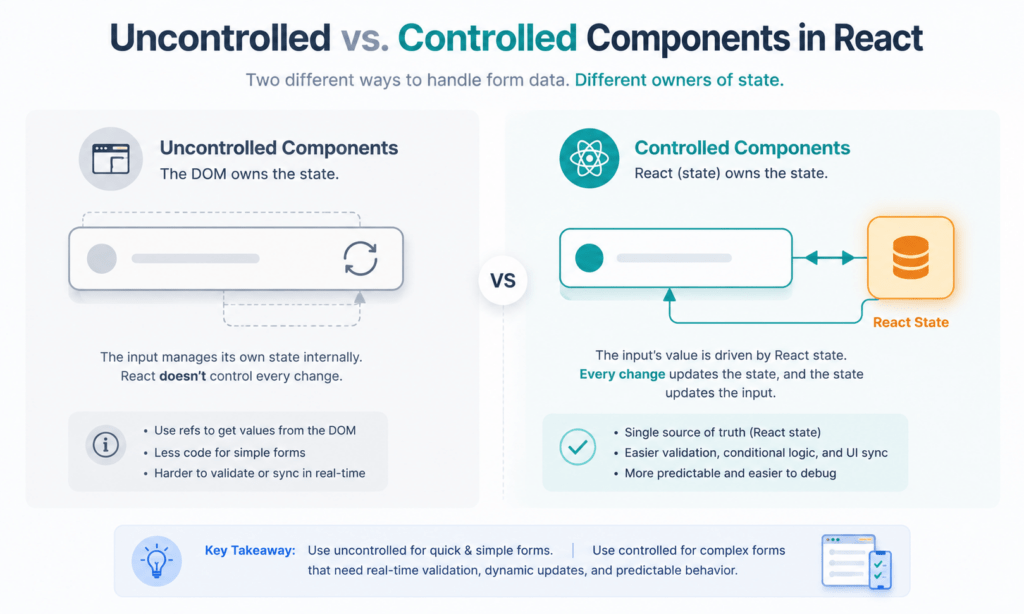
- Uncontrolled components — the traditional way. The DOM itself holds the form data, and you pull values out using a reference (like
useRef) only when you need them, e.g. when the user clicks “Submit.” - Controlled components — the React way. React takes complete ownership of form elements by tying each element’s value directly to the component’s state. Every time a user types a character, state updates, and that state drives what’s displayed in the input field — state and input value stay perfectly synchronized.
Building a Basic Controlled Component
To convert a standard HTML input into a controlled component, you need to do two things:
- Bind the input’s
valueattribute to a React state variable - Provide an
onChangehandler to update that state whenever the user types
Here’s a straightforward text input example:
js
import React, { useState } from 'react';

function SimpleForm() {
  const [name, setName] = useState('');

  const handleSubmit = (e) => {
    e.preventDefault(); // Stop the page from reloading on submit
    alert(`A name was submitted: ${name}`);
  };

  return (
    <form onSubmit={handleSubmit}>
      <label>
        Name:
        <input
          type="text"
          value={name}
          onChange={(e) => setName(e.target.value)}
        />
      </label>
      <button type="submit">Submit</button>
    </form>
  );
}

export default SimpleForm;
Handling Multiple Inputs Elegantly
Creating a separate useState hook and event handler for every input field gets messy once a form grows to 5, 10, or 20 fields.
Instead of writing setName, setEmail, and setPassword separately, you can manage the entire form with a single state object and one shared handler function. The trick is adding a name attribute to your HTML tags and using JavaScript’s computed property names.
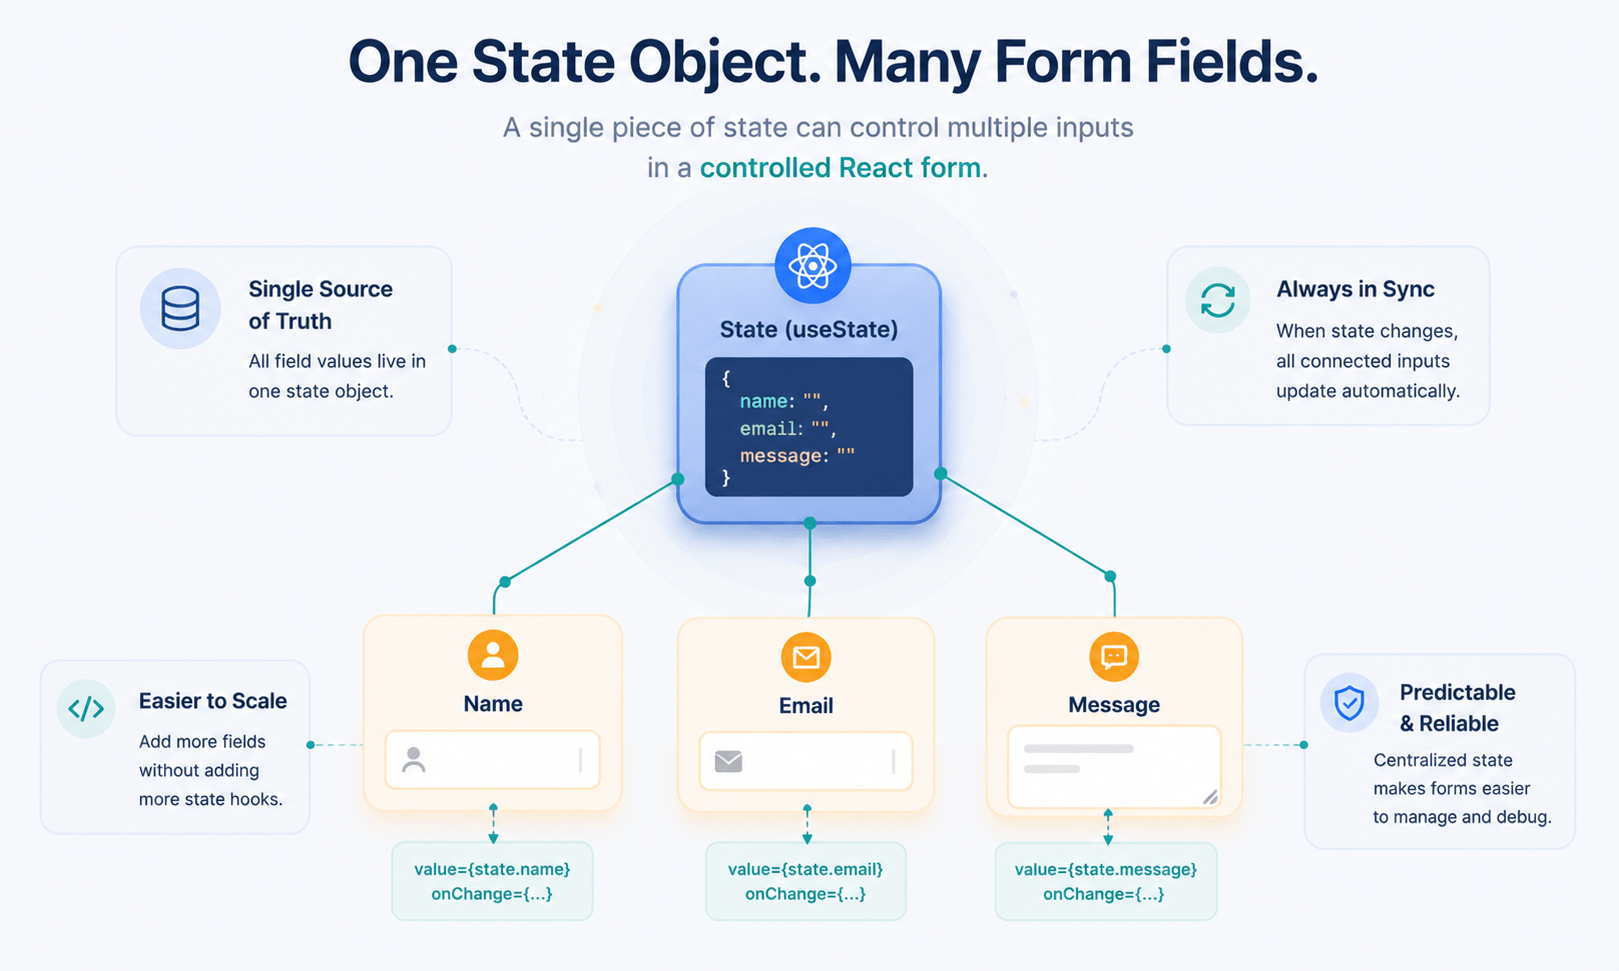
Here’s how to handle a multi-field form cleanly:
js
import React, { useState } from 'react';

function RegistrationForm() {
  // 1. One state object for all fields
  const [formData, setFormData] = useState({
    username: '',
    email: '',
    accountType: 'personal' // Default value for select dropdown
  });

  // 2. A single handler function for all changes
  const handleChange = (e) => {
    const { name, value } = e.target;

    setFormData((prevData) => ({
      ...prevData,      // Copy all existing fields
      [name]: value     // Overwrite only the field that changed
    }));
  };

  const handleSubmit = (e) => {
    e.preventDefault();
    console.log('Form Submitted Data:', formData);
  };

  return (
    <form onSubmit={handleSubmit} style={{ display: 'flex', flexDirection: 'column', gap: '10px', maxWidth: '300px' }}>
      <label>
        Username:
        <input
          type="text"
          name="username" // Must match the state key exactly
          value={formData.username}
          onChange={handleChange}
        />
      </label>

      <label>
        Email:
        <input
          type="email"
          name="email" // Must match the state key exactly
          value={formData.email}
          onChange={handleChange}
        />
      </label>Controlled Components in React: 5 Proven Form Tips

      <label>
        Account Type:
        <select name="accountType" value={formData.accountType} onChange={handleChange}>
          <option value="personal">Personal</option>
          <option value="business">Business</option>
        </select>
      </label>

      <button type="submit">Register</button>
    </form>
  );
}

export default RegistrationForm;
The Benefits of Controlled Components in React
Writing an onChange function for every input feels like extra work initially, but it gives you real control over user data as it enters your app:

- Instant validation — inspect what the user types character-by-character, and reject an invalid character or an over-limit entry before state even changes
- Conditional disabling — keep a “Submit” button disabled (
disabled={!formData.email || !formData.username}) until all required fields are valid - Enforced formats — automatically reformat data on the fly, such as capitalizing strings or injecting dashes into phone numbers as the user types
When to Look Beyond Basic Controlled Forms
Controlled components in React are ideal for basic inputs, feedback fields, and authentication boxes. But if you’re building complex enterprise forms with deeply nested objects, heavy validation rules, or hundreds of fields, managing state manually on every keystroke can hurt performance or become repetitive to write.
For larger production applications, the React ecosystem offers strong form-management libraries that abstract this boilerplate away, such as Formik and React Hook Form.
Frequently Asked Questions
What’s the main difference between controlled and uncontrolled components in React?
Controlled components in React tie an input’s value directly to component state, so React is the single source of truth. Uncontrolled components let the DOM manage its own value internally, and you only read it out (usually via useRef) when needed, like on form submission.
Why do I need an onChange handler for every controlled input?
Because a controlled component’s displayed value comes entirely from state, not from the DOM. Without an onChange handler updating that state, the input would appear frozen — it couldn’t reflect what the user types.
Is it bad for performance to use controlled components in React for large forms?
It can be, if you manage dozens of fields with many individual useState calls and heavy validation on every keystroke. For large or complex forms, libraries like Formik or React Hook Form reduce re-renders and boilerplate significantly.
Can I mix controlled and uncontrolled inputs in the same form?
Technically yes, but it’s not recommended. Switching a single input between controlled and uncontrolled during its lifetime (for example, going from undefined to a real value) triggers a React warning and can cause unpredictable behavior.
Do I need a separate state variable for every form field?
No. As shown in the multi-field example, you can manage an entire form with a single state object and one shared handleChange function, using each input’s name attribute to update only the relevant field.
Conclusion
Controlled components in React bring the chaotic nature of native DOM forms into React’s organized, predictable unidirectional data flow. By tying field values to state and processing changes dynamically, you gain full control over user feedback, validation, and formatting.
In our 10th and final post of this foundational series, we bring everything full circle by exploring lifecycles and the useEffect hook — discovering how to orchestrate data fetching, subscriptions, and cleanups smoothly.