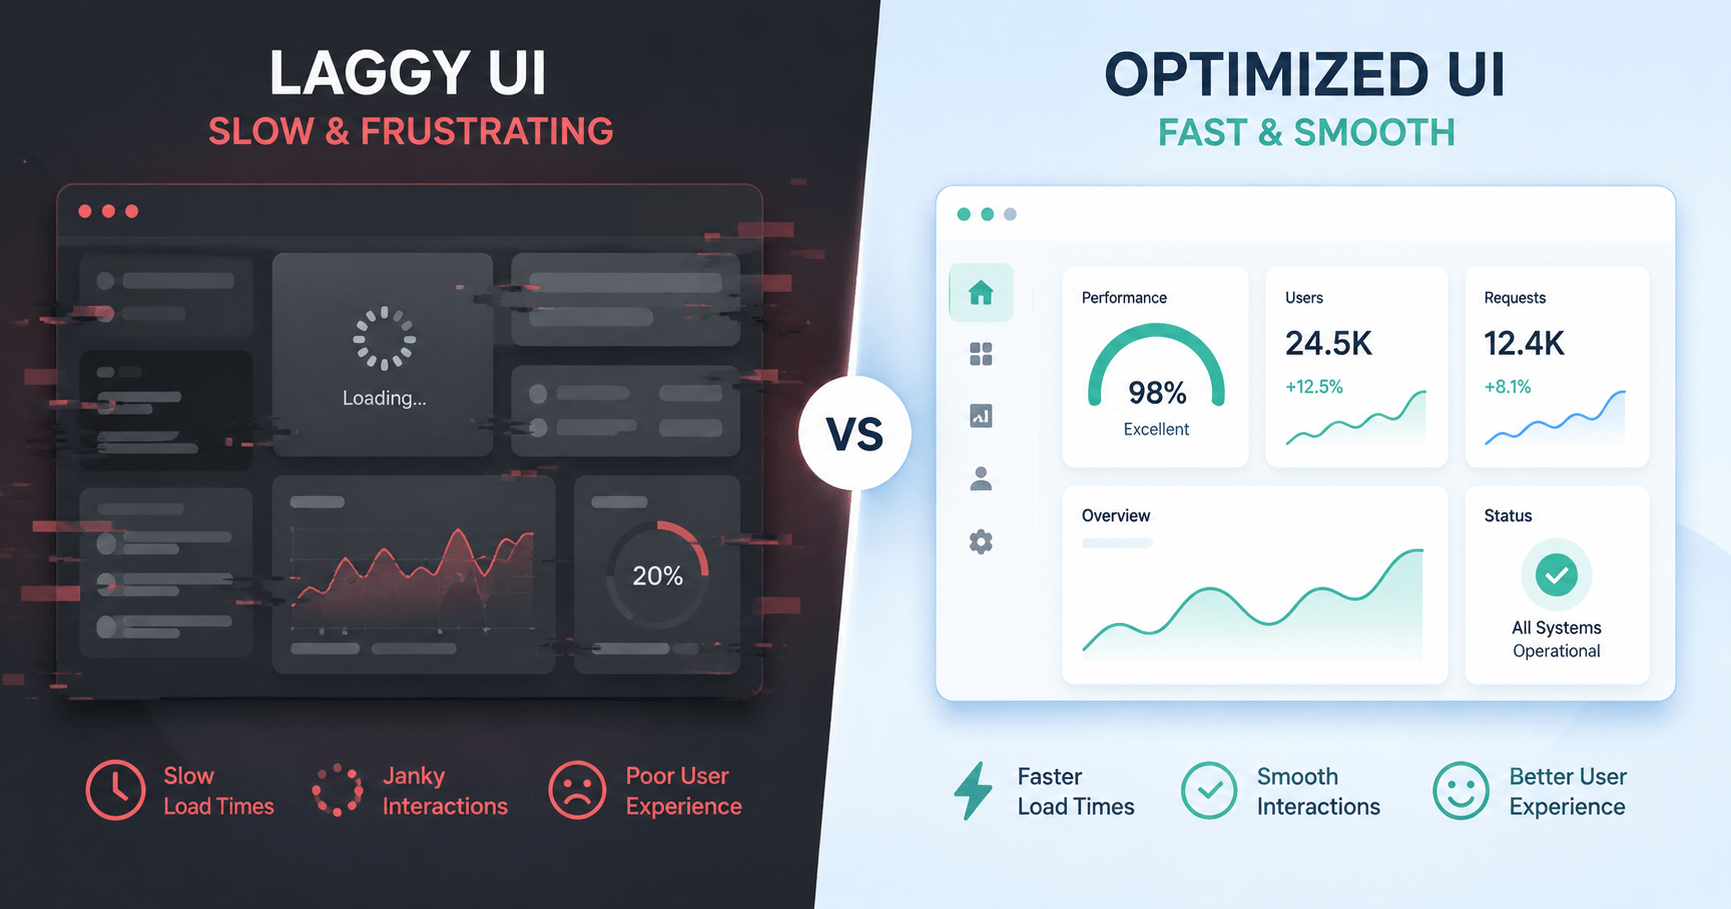

React performance optimization is what separates a demo project from an app your users actually trust on slow networks and cheap phones. Good React performance optimization is only half the job of building a modern web app. Making it run smoothly on low-power devices and unpredictable connections is what turns a decent product into an enterprise-grade one.
A slow UI hits your business metrics directly. Dropped animation frames, high Interaction to Next Paint (INP) latency, jarring Cumulative Layout Shift (CLS), and bloated JavaScript bundles all chip away at user trust before a visitor even reads your content. That is exactly the gap this kind of React performance optimization work is meant to close.
Let us break down the six techniques that matter most for React performance optimization right now: render memoization, dynamic chunk splitting, image handling, debouncing, skeleton states, and list virtualization. Apply even two or three of these and you will notice a real difference in how your app feels.
Also Read: Optimistic UI Updates and Infinite Scroll Pagination
1. Stop Unnecessary Re-renders with React.memo, useMemo, and useCallback
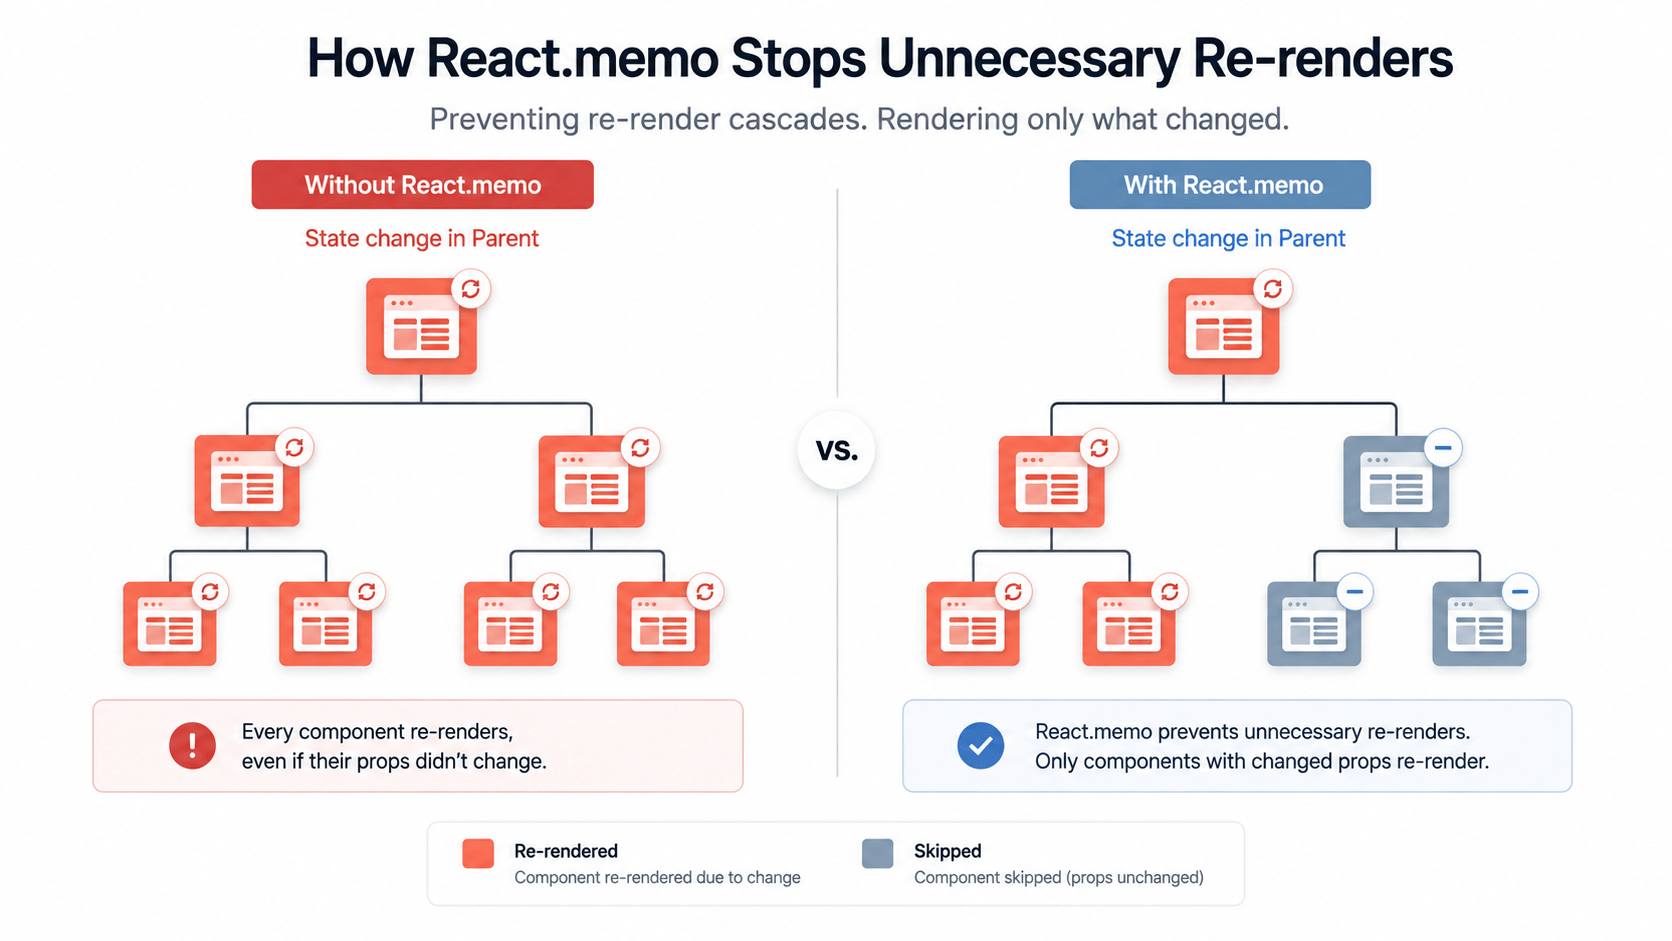
The first and most common React performance optimization win is fixing wasted re-renders, and it’s usually the fastest one to ship. React’s default behavior re-renders a component and every descendant whenever a parent’s state changes. In large component trees with heavy computation, that habit causes real, visible frame drops.
A. Component Memoization with React.memo
Wrap functional components in React.memo so they skip re-rendering when their props haven’t actually changed.
jsx
import React from 'react';

// Re-renders ONLY if `item` or `onSelect` reference changes
export const ExpensiveListItem = React.memo(function ExpensiveListItem({ item, onSelect }) {
  return (
    <div onClick={() => onSelect(item.id)} className="p-4 border-b">
      <h4>{item.title}</h4>
      <p>{item.description}</p>
    </div>
  );
});
B. Stable Function References with useCallback
React.memo only works if it can trust a shallow prop comparison. Pass an inline arrow function as a prop and React creates a brand-new reference on every parent render, which quietly breaks the memoization above.
jsx
// BAD: New function reference created every render
<ExpensiveListItem item={item} onSelect={(id) => doSomething(id)} />

// GOOD: Stable function reference preserved across renders
const handleSelect = useCallback((id) => {
  doSomething(id);
}, []); // Empty dependencies if doSomething is stable

<ExpensiveListItem item={item} onSelect={handleSelect} />
C. Caching Expensive Calculations with useMemo
Skip re-running heavy work, like sorting or filtering a large dataset, on every single render cycle.
jsx
// Computes filtered list ONLY when products or searchCategory change
const filteredProducts = useMemo(() => {
  return products.filter((p) => p.category === searchCategory && p.price > minPrice);
}, [products, searchCategory, minPrice]);
2. Cut Initial Load Time with Dynamic Chunk Splitting
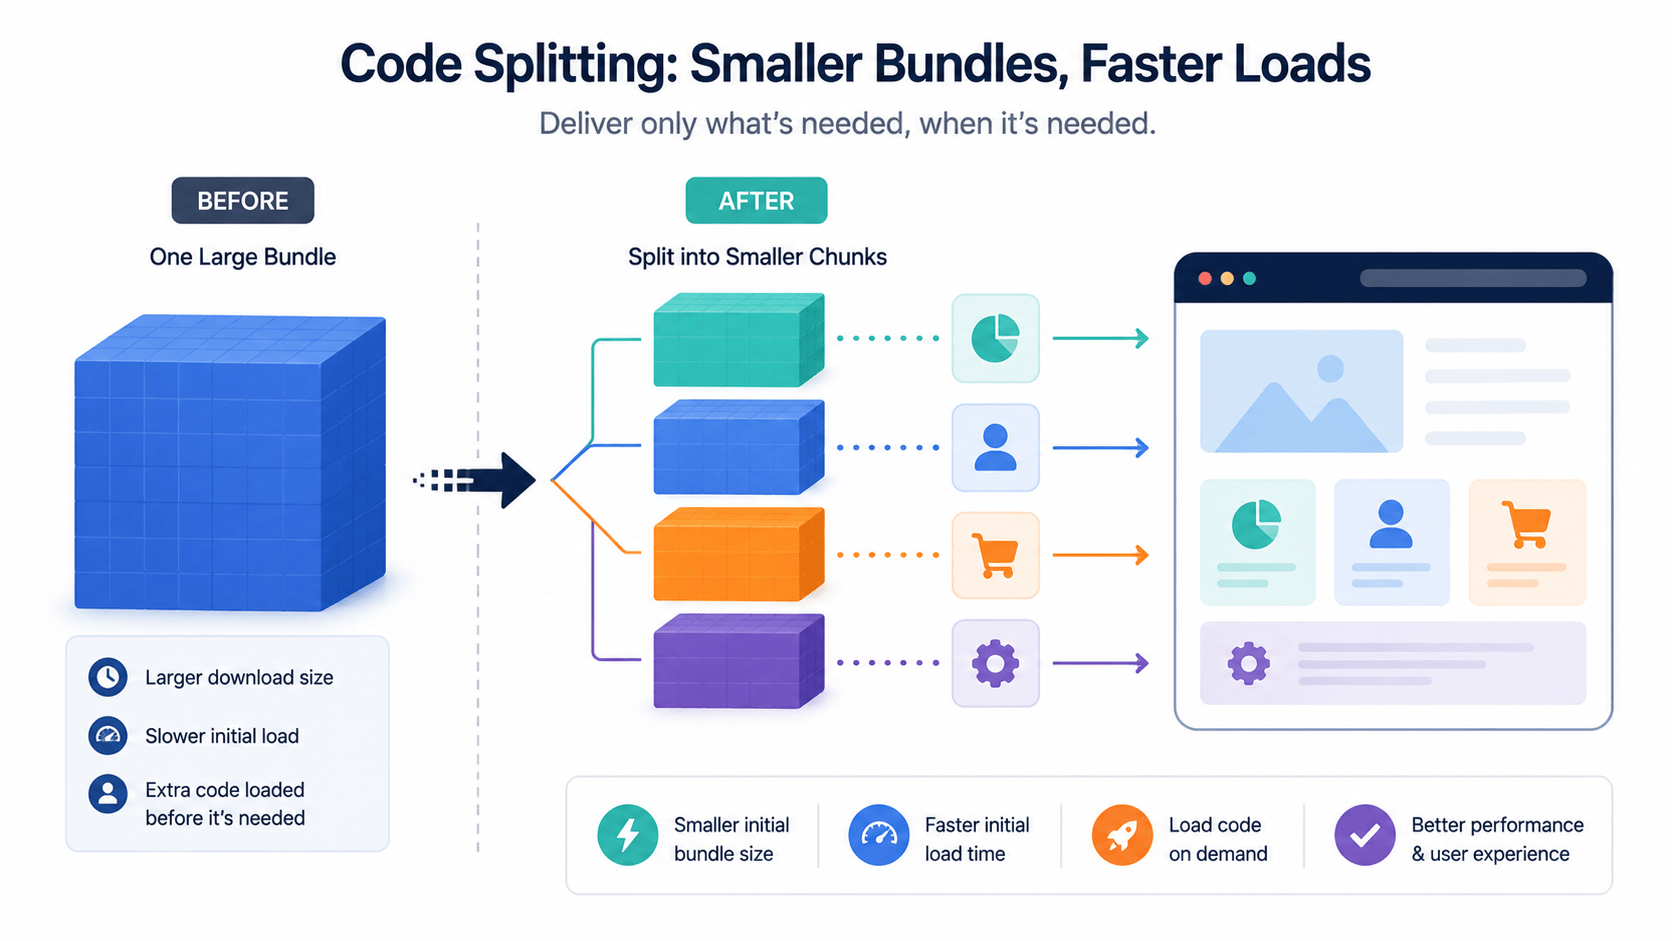
Bundle size is the next lever in any serious React performance optimization pass. Shipping one giant JavaScript bundle blocks the browser’s main thread while it parses and evaluates all that code. Code splitting breaks your app into smaller chunks that load on demand instead of all at once.
Lazy Loading Heavy Components
Rich text editors, chart dashboards, and modal dialogs rarely need to sit in your initial bundle. Load them only when the user actually needs them.
jsx
// Next.js App Router dynamic import
import dynamic from 'next/dynamic';

// Heavy chart component is downloaded ONLY when rendered on screen
const AnalyticsChart = dynamic(() => import('../components/AnalyticsChart'), {
  loading: () => <div className="h-64 bg-gray-100 animate-pulse rounded" />,
  ssr: false, // Optional: disable server-side rendering if browser-only APIs are used
});

export function Dashboard() {
  const [showChart, setShowChart] = useState(false);

  return (
    <div>
      <button onClick={() => setShowChart(true)}>View Analytics</button>
      {showChart && <AnalyticsChart />}
    </div>
  );
}
3. Fix Your Largest Contentful Paint with Image Optimization
Image handling is where React performance optimization work pays off fastest, because unoptimized images are usually the single biggest cause of a slow Largest Contentful Paint (LCP) score and unexpected layout shifts.
jsx
import Image from 'next/image';

export function HeroBanner() {
  return (
    <div className="relative w-full h-96">
      <Image
        src="/hero-banner.jpg"
        alt="Platform showcase screenshot"
        fill
        priority // Preloads above-the-fold image for a faster LCP score
        sizes="(max-width: 768px) 100vw, (max-width: 1200px) 50vw, 33vw"
        className="object-cover"
        placeholder="blur" // Shows a low-res blur while the real image downloads
        blurDataURL="data:image/png;base64,iVBORw0KGgoAAAANSUhEUgAAAAEAAAABCAYAAAAfFcSJAAAADUlEQVR42mNk+M9QDwADhgGAWjR9awAAAABJRU5ErkJggg=="
      />
    </div>
  );
}
As far as React performance optimization goes, next/image handles three things for you automatically:
- Format conversion. It serves modern AVIF or WebP formats when the visitor’s browser supports them.
- Reserved dimensions. It reserves the exact aspect-ratio box before the image bytes arrive, which is what actually prevents CLS.
- Lazy loading. Images below the fold load only as the visitor scrolls near them.
4. Reduce Wasted API Calls with Debouncing and Throttling
Input handling is an easy React performance optimization win that many developers skip, even though it’s one of the simplest React performance optimization fixes on this list. Firing an API request or a heavy re-render on every keystroke or scroll event overwhelms both the browser and your backend.
Debouncing Search Inputs (A Simple React Performance Optimization Win)
Wait until the user actually pauses typing (say, 300ms) before you process anything.
jsx
import { useState, useEffect } from 'react';

export function useDebounce(value, delay = 300) {
  const [debouncedValue, setDebouncedValue] = useState(value);

  useEffect(() => {
    const handler = setTimeout(() => setDebouncedValue(value), delay);
    return () => clearTimeout(handler); // Cleanup timer on keypress
  }, [value, delay]);

  return debouncedValue;
}

// Usage in a search bar
function SearchComponent() {
  const [query, setQuery] = useState('');
  const debouncedSearch = useDebounce(query, 300);

  useEffect(() => {
    if (debouncedSearch) {
      // Trigger the fetch ONLY after the user stops typing for 300ms
      fetchSearchResults(debouncedSearch);
    }
  }, [debouncedSearch]);

  return <input value={query} onChange={(e) => setQuery(e.target.value)} />;
}
Throttling Scroll and Resize Listeners
Throttling caps a handler to run at most once per fixed interval, say every 100ms, during continuous events like scrolling or resizing. Use it anywhere a listener fires far more often than your UI actually needs to update, and this small React performance optimization step alone can noticeably smooth out scroll-heavy pages.
5. Prevent Layout Shift with Skeleton Loaders
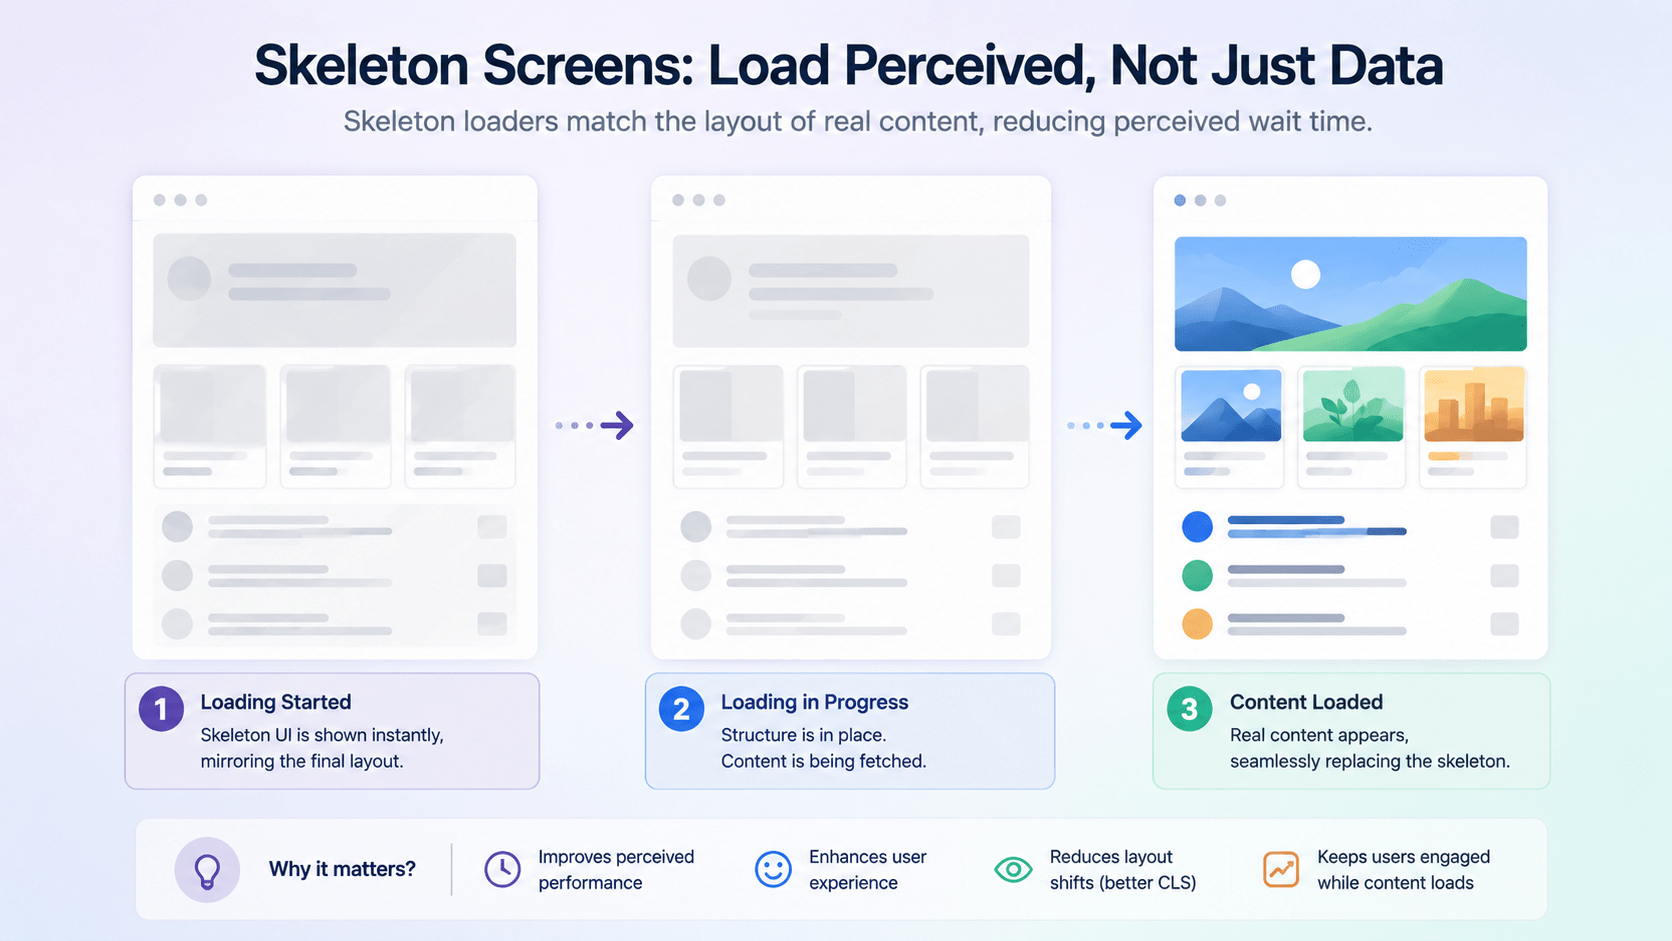
Not every React performance optimization technique is about raw speed. Some, like skeleton loaders, are about perceived speed. A full-screen spinner creates a visual jolt when content suddenly pops into place and shoves everything else down. A skeleton screen matches the exact shape of the incoming data instead.
jsx
// Skeleton card matching exact post dimensions
export function PostSkeleton() {
  return (
    <div className="p-4 border rounded-lg animate-pulse space-y-3">
      <div className="h-6 bg-gray-200 rounded w-3/4" />
      <div className="h-4 bg-gray-200 rounded w-full" />
      <div className="h-4 bg-gray-200 rounded w-5/6" />
      <div className="flex gap-2 pt-2">
        <div className="h-8 w-8 bg-gray-200 rounded-full" />
        <div className="h-4 bg-gray-200 rounded w-1/4 my-auto" />
      </div>
    </div>
  );
}
Two things make skeleton loaders worth the extra component in any React performance optimization plan:
- Perceived speed. Users read skeleton states as loading faster than an indeterminate spinner, even at the same actual load time.
- Zero CLS. Reserving the exact height and width up front means nothing reflows when real data replaces the skeleton.
6. Handle Massive Lists with Virtualization
The last technique in this React performance optimization list is also the one with the biggest payoff for data-heavy apps. Rendering thousands of DOM nodes at once, think a long feed or a big data table, wrecks browser memory and scroll performance. List virtualization renders only the rows currently visible in the viewport.
jsx
import { useVirtualizer } from '@tanstack/react-virtual';

export function VirtualList({ items }) {
  const parentRef = React.useRef(null);

  const rowVirtualizer = useVirtualizer({
    count: items.length,
    getScrollElement: () => parentRef.current,
    estimateSize: () => 50, // Height in pixels per row
  });

  return (
    <div ref={parentRef} className="h-96 overflow-auto border">
      <div
        style={{
          height: `${rowVirtualizer.getTotalSize()}px`,
          position: 'relative',
          width: '100%',
        }}
      >
        {rowVirtualizer.getVirtualItems().map((virtualItem) => (
          <div
            key={virtualItem.key}
            style={{
              position: 'absolute',
              top: 0,
              left: 0,
              width: '100%',
              height: `${virtualItem.size}px`,
              transform: `translateY(${virtualItem.start}px)`,
            }}
          >
            Row {virtualItem.index}: {items[virtualItem.index].name}
          </div>
        ))}
      </div>
    </div>
  );
}
Even if items holds 100,000 records, only 10 to 15 DOM nodes ever exist in the tree at once, no matter how far the user scrolls. Of all six techniques here, this is the one with the most dramatic before-and-after for React performance optimization on data-heavy screens.
Also Read: WebMCP Explained: 7 Real Risks Before You Go AI-Ready
Here’s how each React performance optimization technique maps to the metric it actually moves:
Quick Reference: React Performance Optimization Techniques vs. Metric
| Performance Technique | Problem It Solves | Metric It Improves |
|---|---|---|
| React.memo & useCallback | Redundant component re-rendering | Interaction to Next Paint (INP) |
| next/dynamic & React.lazy | Oversized initial JavaScript bundle | First Contentful Paint (FCP) |
| next/image | Layout reflows and heavy image formats | Largest Contentful Paint (LCP), CLS |
| Debouncing & throttling | Redundant network calls and main-thread locking | INP, CPU load |
| Skeleton screens | Jarring asynchronous loading states | Perceived latency, CLS |
| List virtualization | Unbounded DOM node counts | Memory usage, scroll FPS |
FAQ
Does React performance optimization require rewriting my whole app? No. Most of these six techniques, memoization, dynamic imports, debouncing, are additive. You can apply them one component at a time without touching your overall architecture, which is what makes React performance optimization approachable for a small team.
Which technique should I apply first? Start with next/image and dynamic imports. They usually deliver the biggest LCP and bundle-size wins for the least code change, and they’re often the first two items on any React performance optimization checklist.
Does list virtualization hurt SEO since content isn’t in the DOM? For client-side interactive lists like feeds or tables, no, search engines aren’t indexing that content the same way they index server-rendered article text. Avoid virtualizing content you actually need crawled and indexed.
Do I need a library for debouncing, or can I write it myself? The custom useDebounce hook above is about ten lines and covers most cases. Reach for a library like lodash.debounce only if you need more advanced options like leading-edge execution.
Conclusion
A fast, fluid React app comes from stacking small, deliberate fixes: render memoization, dynamic chunk splitting, optimized images, debounced input handling, skeleton states, and virtualized lists. This is what real React performance optimization looks like in practice, not one silver-bullet fix but six small ones stacked together. None of these six techniques is difficult on its own. Start with whichever one addresses your worst Core Web Vitals score today, then work through the rest as your React performance optimization checklist grows.